Sunday 25 January 2015
Saturday 24 January 2015
Final Iteration Source Code
This is the source code for the final version of my sketch. I'm overall happy with the functionality of the processing code, most of the problems are related to the shoebox contraption rather than the actual code itself.
import processing.video.*;
import lusidOSC.*;
LusidClient lusidClient;
PFont font;
PImage img1;
PImage img2;
PImage img3;
PImage img4;
PImage img5;
PImage img6;
PImage img7;
PImage img8;
PImage img9;
PImage img10;
PImage imgS;
PImage imgS2;
PImage imgS3;
PImage imgS4;
PImage imgS5;
boolean keyUnlock1 = false;
boolean keyUnlock2 = false;
boolean keyUnlock3 = false;
boolean keyUnlock4 = false;
boolean keyUnlock5 = false;
Movie myMovie;
Movie myMovie2;
Movie myMovie3;
Movie myMovie4;
Movie myMovie5;
boolean sketchFullScreen() {
return true;
}
// setup: gets called once when the application starts.
void setup()
{
frameRate(30);
imgS = loadImage("safe2.jpg");
imgS2 = loadImage("safe.jpg");
imgS3 = loadImage("safe.jpg");
imgS4 = loadImage("safe.jpg");
imgS5 = loadImage("safe.jpg");
img1 = loadImage("locked11.png");
img2 = loadImage("locked12.png");
img3 = loadImage("locked13.png");
img4 = loadImage("locked14.png");
img5 = loadImage("locked15.png");
img6 = loadImage("unlocked1.png");
img7 = loadImage("unlocked2.png");
img8 = loadImage("unlocked3.png");
img9 = loadImage("unlocked4.png");
img10 = loadImage("unlocked5.png");
// setup the processing display window
//size(620,480,JAVA2D);
size(displayWidth, displayHeight,JAVA2D);
// set the framerate to 30 frames/sec.
frameRate(30);
// set the ellipse drawing mode to: center.
ellipseMode(CENTER);
// Create an instance of the LusidClient. The LusidClient expects
// an implementation of the 3 LusidOSC callback methods (see below).
lusidClient = new LusidClient(this);
// we're drawing text, so setup a font.
// turn smoothing on.
smooth();
myMovie = new Movie(this, "layer1.mov");
myMovie.loop();
myMovie.play();
myMovie2 = new Movie(this, "safe2.mov");
myMovie2.loop();
myMovie3 = new Movie(this, "layer3.mov");
myMovie3.loop();
myMovie4 = new Movie(this, "layer4.mov");
myMovie4.loop();
myMovie5 = new Movie(this, "layer5.mov");
}
void draw()
{
// clear the background to white.
background(255, 255, 255);
// image(imgS, 0, 0);
// imgS.resize(displayWidth, displayHeight);
image(myMovie, 0, 0,width,height);
// get the list of all objects that are currently present
LusidObject[] lusidObjectList = lusidClient.getLusidObjects();
//shape 1
for (int i=0; i<lusidObjectList.length; i++) {
LusidObject lObj1 = lusidObjectList[i];
// shift the X and Y so they are centered on the screen.
int x1 = width/2 + lObj1.getX();
int y1 = height/2 - lObj1.getY();
float rotation1 = lObj1.getRotZ();
// set the fill color
fill(120, 120, 0);
//rect(x1, y1, 20, 20);
noStroke();
ellipse(x1, y1, 20, 20);
//shape 2
// now draw lines to all of the other objects.
// start at the next element in the list (i+1) since
// otherwise we'll repeat ourselves (drawing lines both ways).
for (int j=i+1; j<lusidObjectList.length; j++) {
LusidObject lObj2 = lusidObjectList[j];
// shift the X and Y so they are centered on the screen.
int x2 = width/2 + lObj2.getX();
int y2 = height/2 - lObj2.getY();
float rotation2 = lObj2.getRotZ();
fill(0, 128, 255, 120);
noStroke();
ellipse(x2, y2, 40, 40);
//shape 3
for (int k=j+1; k<lusidObjectList.length; k++) {
LusidObject lObj3 = lusidObjectList[k];
int x3 = width/2 + lObj3.getX();
int y3 = height/2 - lObj3.getY();
float rotation3 = lObj3.getRotZ();
fill(153, 0, 0, 80);
noStroke();
ellipse(x3, y3, 60, 60);
//shape 4
for (int m=k+1; m<lusidObjectList.length; m++) {
LusidObject lObj4 = lusidObjectList[m];
// shift the X and Y so they are centered on the screen.
int x4 = width/2 + lObj4.getX();
int y4 = height/2 - lObj4.getY();
float rotation4 = lObj4.getRotZ();
fill(0, 120, 0, 120);
noStroke();
ellipse(x4, y4, 80, 80);
//shape 5
for (int c=m+1; c<lusidObjectList.length; c++) {
LusidObject lObj5 = lusidObjectList[c];
// shift the X and Y so they are centered on the screen.
int x5 = width/2 + lObj5.getX();
int y5 = height/2 - lObj5.getY();
float rotation5 = lObj5.getRotZ();
fill(255, 128, 0, 120);
noStroke();
ellipse(x5, y5, 100, 100);
float d = dist(x1, y1, x2, y2);
float q = dist(x1, y1, x3, y3);
float z = dist(x1, y1, x4, y4);
float u = dist(x2, y2, x3, y3);
float h = dist(x4, x4, x5, y5);
println("Distance between objects Q: " + q);
println("Distance between objects D: " + d);
println("Distance between objects Z: " + z);
println("Distance between objects U: " + u);
println("Distance between objects H: " + h);
if ( (keyUnlock1 == true) && (keyUnlock2 == true)) {
image(myMovie2, 0, 0,width,height);
}
if ( (keyUnlock1 == true) && (keyUnlock2 == true) && (keyUnlock3 == true)) {
image(myMovie3, 0, 0,width,height);
}
if ( (keyUnlock1 == true) && (keyUnlock2 == true) && (keyUnlock3 == true) && (keyUnlock4 == true)) {
image(myMovie4, 0, 0,width,height);
}
if ( (keyUnlock1 == true) && (keyUnlock2 == true) && (keyUnlock3 == true) && (keyUnlock4 == true) && (keyUnlock5 == true)) {
image(myMovie5, 0, 0,width,height);
myMovie5.play();
}
if ((d > 140) && (d < 160)) {
keyUnlock1 = true;
} else {
keyUnlock1 = false;
}
if (keyUnlock1 == true) {
//fill(204, 0, 102););
fill(152, 51, 255);
stroke(152, 51, 255);
image(img6, -50, 0);
img6.resize(displayWidth, displayHeight);
}
if (keyUnlock1 == false) {
stroke(255, 255, 196, 80);
fill(0, 0, 0, 120);
myMovie.play();
image(img1, 0, 0);
img1.resize(displayWidth, displayHeight);
}
if ((q > 170) && (q < 195)) {
keyUnlock2 = true;
} else {
keyUnlock2 = false;
}
if (keyUnlock2 == true) {
stroke(204, 204, 51 );
image(img7, -50, 0);
img7.resize(displayWidth, displayHeight);
}
if (keyUnlock2 == false) {
image(img2, 0, 0);
img2.resize(displayWidth, displayHeight);
}
if ((z > 245) && (z < 265)) {
keyUnlock3 = true;
} else {
keyUnlock3 = false;
}
if (keyUnlock3 == true) {
image(img8, -50, 0);
img8.resize(displayWidth, displayHeight);
stroke(255, 0, 0 );
}
if (keyUnlock3 == false) {
image(img3, 0, 0);
img3.resize(displayWidth, displayHeight);
}
if ((u > 155) && (u < 170)) {
keyUnlock4 = true;
} else {
keyUnlock4 = false;
}
if (keyUnlock4 == true) {
image(img9, -50, 0);
img9.resize(displayWidth, displayHeight);
stroke(255, 0, 0 );
}
if (keyUnlock4 == false) {
image(img4, 0, 0);
img4.resize(displayWidth, displayHeight);
}
if ((h > 620) && (h < 660)) {
keyUnlock5 = true;
} else {
keyUnlock5 = false;
}
if (keyUnlock5 == true) {
image(img10, -50, 0);
img10.resize(displayWidth, displayHeight);
fill(255, 128, 0);
}
if (keyUnlock5 == false) {
image(img5, 0, 0);
img5.resize(displayWidth, displayHeight);
}
// calculate the mid-point between the two objects.
//X1
float xM = (x1+x2)/2;
float yM = (y1+y2)/2;
float xM2 = (x1+x3)/2;
float yM2 = (y1+y3)/2;
float xM3 = (x1+x4)/2;
float yM3 = (y1+y4)/2;
float xM7 = (x1+x5)/2;
float yM7 = (y1+y5)/2;
//X2
float xM4 = (x2+x1)/2;
float yM4 = (y2+y1)/2;
float xM5 = (x2+x3)/2;
float yM5 = (y2+y3)/2;
float xM6 = (x2+x4)/2;
float yM6 = (y2+y4)/2;
float xM8 = (x4+x5)/2;
float yM8 = (y4+y5)/2;
noFill();
// use the distance to determine how quickly things vibrate.
float vibrationSpeed = 5000.0 / (d*d + 0.1);
// float vibrationSpeed = 2000.0 / (q*q + 0.1);
// just throw in some crazy numbers based on frameCount to make things vibrate...
float f = frameCount*vibrationSpeed;
// X1
bezier(x1, y1, xM + 7*sin(f/2+i*3+j), yM + 10*sin(f/2+i+j), xM - 8*sin(f/1.7), yM - 8*sin(f/3 + +i+j*4), x2, y2);
bezier(x1, y1, xM - 7*sin(f/2+i*3+j), yM - 10*sin(f/2+i+j), xM + 8*sin(f/1.7), yM + 8*sin(f/3 + +i+j*4), x2, y2);
bezier(x1, y1, xM + 5*sin(f*1.5+i*4+j), yM + 3*sin(f/2+i+j), xM - 2*sin(f/3), yM - 7*sin(f +i+j*5), x2, y2);
bezier(x1, y1, xM2 + 7*sin(f/2+i*3+j), yM2 + 10*sin(f/2+i+j), xM2 - 8*sin(f/1.7), yM2 - 8*sin(f/3 + +i+j*4), x3, y3);
bezier(x1, y1, xM2 - 7*sin(f/2+i*3+j), yM2 - 10*sin(f/2+i+j), xM2 + 8*sin(f/1.7), yM2 + 8*sin(f/3 + +i+j*4), x3, y3);
bezier(x1, y1, xM2 + 5*sin(f*1.5+i*4+j), yM2 + 3*sin(f/2+i+j), xM2 - 2*sin(f/3), yM2 - 7*sin(f +i+j*5), x3, y3);
bezier(x1, y1, xM3 + 7*sin(f/2+i*3+j), yM3 + 10*sin(f/2+i+j), xM3 - 8*sin(f/1.7), yM3 - 8*sin(f/3 + +i+j*4), x4, y4);
bezier(x1, y1, xM3 - 7*sin(f/2+i*3+j), yM3 - 10*sin(f/2+i+j), xM3 + 8*sin(f/1.7), yM3 + 8*sin(f/3 + +i+j*4), x4, y4);
bezier(x1, y1, xM3 + 5*sin(f*1.5+i*4+j), yM3 + 3*sin(f/2+i+j), xM3 - 2*sin(f/3), yM3 - 7*sin(f +i+j*5), x4, y4);
bezier(x2, y2, xM5 + 7*sin(f/2+i*3+j), yM5 + 10*sin(f/2+i+j), xM5 - 8*sin(f/1.7), yM5 - 8*sin(f/3 + +i+j*4), x3, y3);
bezier(x2, y2, xM5 - 7*sin(f/2+i*3+j), yM5 - 10*sin(f/2+i+j), xM5 + 8*sin(f/1.7), yM5 + 8*sin(f/3 + +i+j*4), x3, y3);
bezier(x2, y2, xM5 + 5*sin(f*1.5+i*4+j), yM5 + 3*sin(f/2+i+j), xM5 - 2*sin(f/3), yM5 - 7*sin(f +i+j*5), x3, y3);
//bezier(x2, y2, xM6 + 7*sin(f/2+i*3+j), yM6 + 10*sin(f/2+i+j), xM5 - 8*sin(f/1.7), yM5 - 8*sin(f/3 + +i+j*4), x4, y4);
//bezier(x2, y2, xM6 - 7*sin(f/2+i*3+j), yM6 - 10*sin(f/2+i+j), xM5 + 8*sin(f/1.7), yM5 + 8*sin(f/3 + +i+j*4), x4, y4);
// bezier(x2, y2, xM6 + 5*sin(f*1.5+i*4+j), yM6 + 3*sin(f/2+i+j), xM5 - 2*sin(f/3), yM5 - 7*sin(f +i+j*5), x4, y4);
bezier(x4, y4, xM8 + 7*sin(f/2+i*3+j), yM8 + 10*sin(f/2+i+j), xM8 - 8*sin(f/1.7), yM8 - 8*sin(f/3 + +i+j*4), x5, y5);
bezier(x4, y4, xM8 - 7*sin(f/2+i*3+j), yM8 - 10*sin(f/2+i+j), xM8 + 8*sin(f/1.7), yM8 + 8*sin(f/3 + +i+j*4), x5, y5);
bezier(x4, y4, xM8 + 5*sin(f*1.5+i*4+j), yM8 + 3*sin(f/2+i+j), xM8 - 2*sin(f/3), yM8 - 7*sin(f +i+j*5), x5, y5);
fill(0, 0, 0);
strokeWeight(2); // Thicker
font = loadFont("SecretAgency-48.vlw");
textFont(font, 24);
text(d, width/11-20, height-150);
text(q,width/3-110 , height-150);
text(z, width/2-60, height-150);
text(u, width/2+340, height-150);
text(h, width/1-240, height-150);
textSize(20);
}
}
}
}
}
}
// -------------------------------------------------------------------
// these methods are called whenever a LusidOSC event occurs.
// -------------------------------------------------------------------
// called when an object is added to the scene
void addLusidObject(LusidObject lObj) {
}
// called when an object is removed from the scene
void removeLusidObject(LusidObject lObj) {
}
// called when an object is moved
void updateLusidObject (LusidObject lObj) {
}
void movieEvent(Movie m) {
m.read();
}
// -------------------------------------------------------------------
// This is a helper class to get color data from Trackmate objects.
// -------------------------------------------------------------------
class ColorData{
color[] colors = {
0, 0, 0, 0, 0, 0 };
final int INDEX_WHITE = 4;
final int INDEX_BLACK = 5;
boolean hasColorData = false;
public ColorData(LusidObject lObj){
if(lObj == null){
return;
}
if(lObj.getEncoding().equals("trackmate")){
String colorString = lObj.getData();
String cArray[] = colorString.split(",");
try{
if(cArray.length == 6){
for(int i=0; i<6; i++){
String cString = cArray[i];
if(cString.length() == 8){
int b = Integer.parseInt(cString.substring(2,4), 16);
int g = Integer.parseInt(cString.substring(4,6), 16);
int r = Integer.parseInt(cString.substring(6,8), 16);
//println("cString = " + cString + " :: " +r+","+g+","+b);\
colors[i] = color(r,g,b);
hasColorData = true;
}
}
}
}
catch(Exception e){
println("color data attached to lusid object is bogus! :: " + colorString);
e.printStackTrace();
}
}
}
}
Review Of Applied Methodology
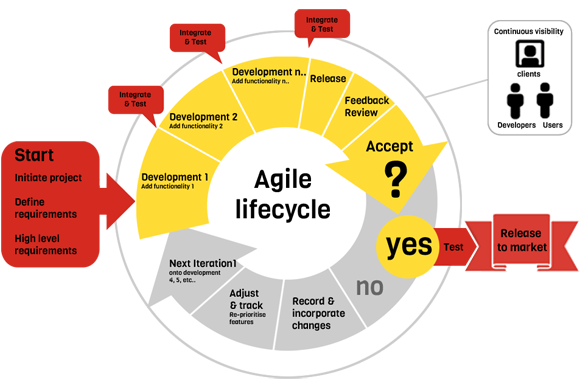
The "Agile" development method I worked by in this project had it's advantages and disadvantages. For example due to me not having much experience with software such as Processing the technical feasibility of this project was initially hard to comprehend. Being able to adapt the design and specification of my project as I became more confident with software served as a comfortable way of working and resulted in the development of the project making massive progress in 2-3 days intervals. An example of this is when I started coding the "If" statements into the sketch, I would first create one "if" statement and thoroughly test it's functionality by changing values and the output. Once I was confident in the use of "If" statements I then aimed to produce the sketch which was specified in my initial pseudo code using the combination of "if" statements and "functions".
Once that was completed I then got feedback from friends and family who gave feedback on aspect of the sketch such as difficulty and presentation. The feedback received suggested that my sketch lacked a sufficient level of difficulty and the static background wasn't visually attractive for the audience.
This feedback would then serve as the primary focus in the next iteration and is reflected in 2nd piece of pseudo code. The way in which the difficultly issue was addressed in the second iteration is by implementing an additional three trackable objects which resulted in a total of five trackable objects for the whole sketch. Theses additional objects enabled me to implement more stages to the encryption puzzle resulting in the user needing to solve the distances of five objects before the sketch is completed. I believe this greatly increased the complexity of the sketch therefore solving the difficulty issue addressed in the feedback. These changes were undertaken in a process of constant implementation and testing as I wanted the distances between the objects to vary and not be predictable to the user.
To solve the "static visuals" issue I implemented video backgrounds which were made using the Adobe After effects software. After Effects enabled me to use the static image of a safe as a background aswell as apply dynamic distortion effects which hindered the visual clarity of the background image. This method enabled me to apply multiple "layers" of distortion effects which easily allowed me to disable certain effects as the user progresses in the puzzle. The disadvantage of doing this is that the file size of the project increased massively as the project folder now had to accommodate five different video files. The production of the videos was done relatively quickly due to the disabling of effects method I used which was helpful as the videos were rendered and altered multiple times before I was satisfied with them.
One issue I have with this type of project methodology is that after every iteration I had the feeling that my project still had aspects which could be improved which ultimately results in an endless cycle of development until the deadline is reached.
Wednesday 21 January 2015
Contextual Influence of Project
The reason I created a crypto-system for my project is so the audience is required to think about their interaction with the project as it's not like a contemporary crpyto-system. The user is required to interact with the project in order to understand how it functions, I wanted to encapsulate a sense of mystery in the audience when they first interact with the display which I believe exacerbates the sense of success in the audience when they complete the puzzle. The cypto-system I used in my sketch I like think is quite unique and therefore unknown. When researching concepts for my project I randomly encountered the quote "The Cave you fear to enter holds the treasure you seek.". I extracted what I perceived as the contextual messages in this quote and made me think about "humanities fear of the unknown".

I though about how I could convey the same contextual message in an interactive installation. The "unknown" aspect of my installation would be the cypto-system which is designed to appear alien to user, while the clear visual distortion represents the "hiding of the treasure" which serves as inspiration to overcome the user's fear of the unknown.
Tuesday 20 January 2015
Interactive Interface Design
As my project utilizes a different method of user navigation it's important that the user can receive instant feedback when they interact with an unknown navigation device or method. For example a user can very quickly understand how to use a device such as a mouse as the movement of the mouse cursor on the screen reacts immediately to the movement of the physical device. The mouse cursor moves in the same direction as the mouse therefore there isn't a very high level of difficulty involved in the use of the device and before long be used intuitively.
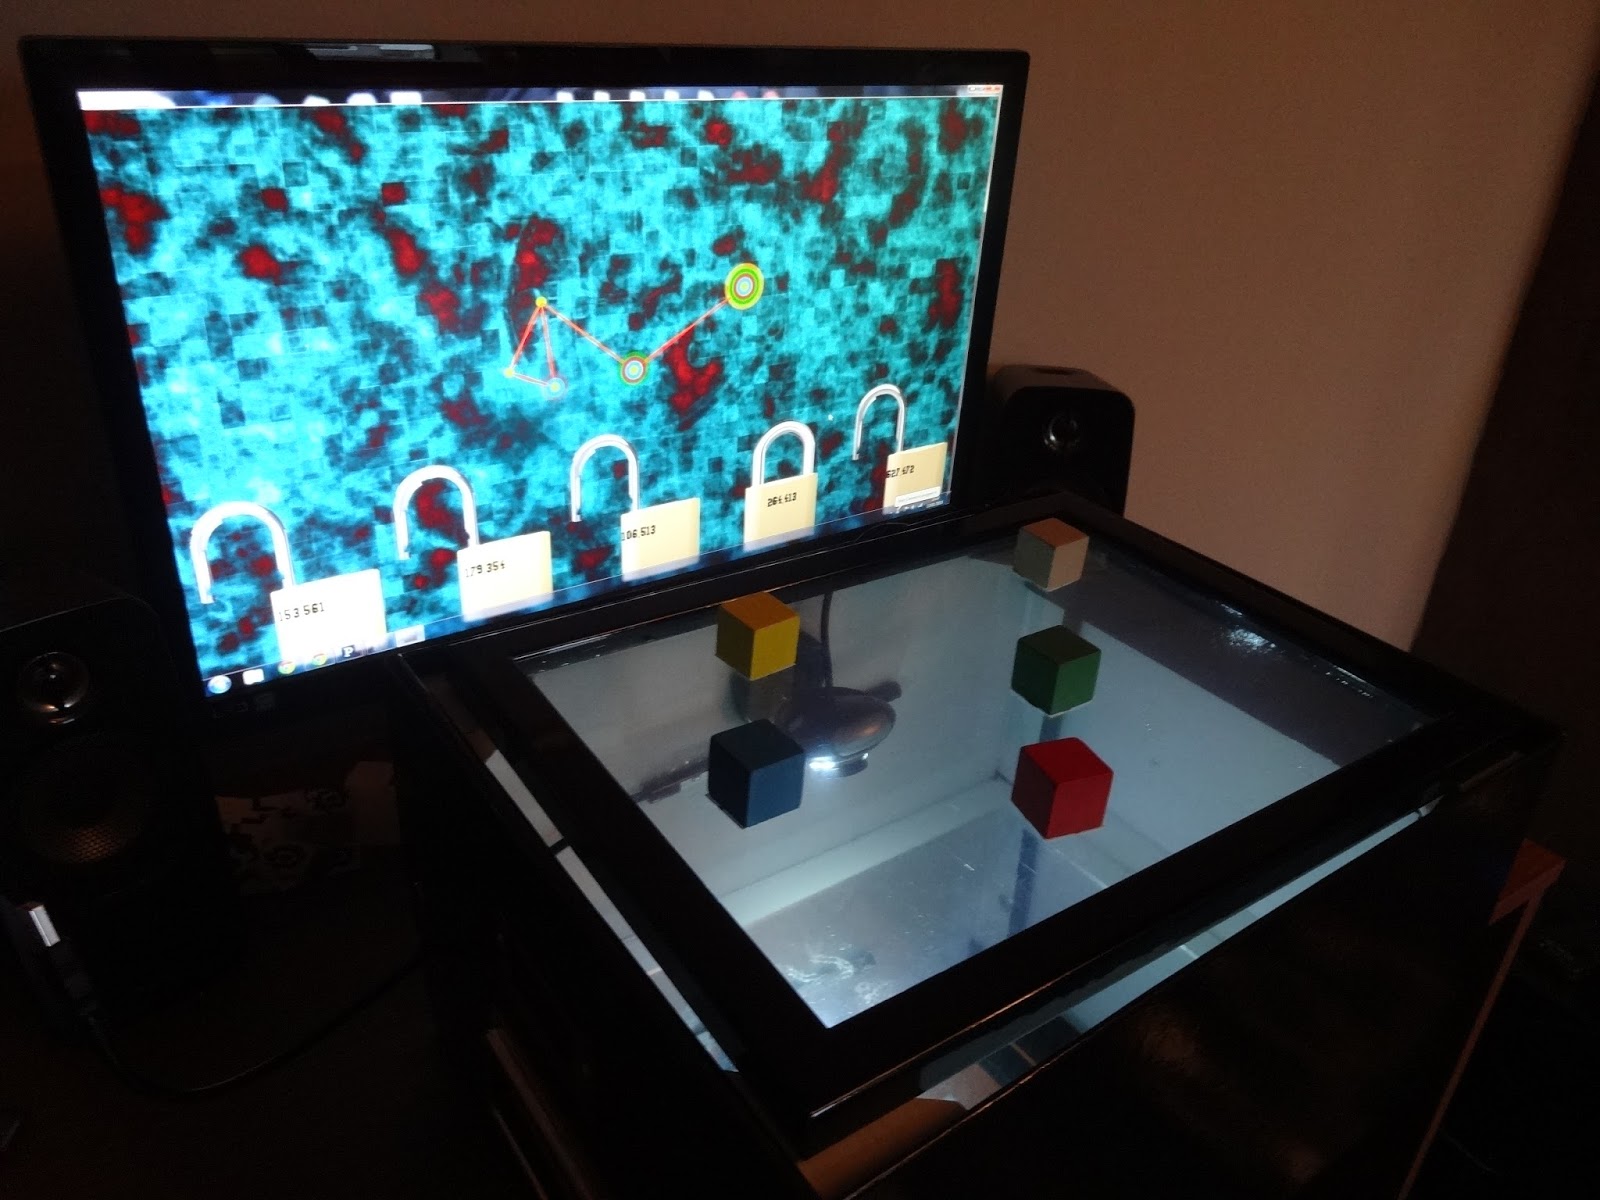
 My project utilizes a navigation method which involves the movement of trackable objects. The objects would be tracked using a webcam and the object's positions would be represented on the digital display instantly. The user would know relatively soon after interacting with the objects that there positions are significant in the decryption of the puzzle due the visual feedback being provided by the sketches display.
I'm hoping that the this navigation method could be used intuitively much like a mouse however the tests so far undertaken by me, suggest that the webcam isn't 100% reliable when tracking the objects positions therefore resulting in a navigation method which isn't as immersive or intuitive as a mouse.
I'm hoping that the this navigation method could be used intuitively much like a mouse however the tests so far undertaken by me, suggest that the webcam isn't 100% reliable when tracking the objects positions therefore resulting in a navigation method which isn't as immersive or intuitive as a mouse.
Saturday 17 January 2015
Problems & Design Solutions
Problem 1: Project lacks sufficient difficulty
Design Solution:
I added additional trackable objects into the sketch which resulted in a total of five levels of encryption for my sketch which greatly increased the difficultly and complexity of the sketch.
Problem 2: Display is static and unattractive
Design Solution:
The static background image was replaced with a dynamic video file consisting of visual effects which made the sketch visually more attractive. There's a also a separate background for each level of encryption.
Problem 3: Display lacks visual feedback for the user
Design Solution:
Originally the only visual feedback the user would receive would be the colour change of the lines drawn between the object's location. The sketch now utilizes a padlock system which gives the user visual feedback on what part of the puzzle is complete and what part is not.
Problem 4: Webcam light in Shoebox contraption generates too much glare
Design Solution:
Implement a separate light into the shoebox contraption which has less intense glare
Problem 5: Mac Mini in foyer space only has one USB slot, shoebox contraption requires two USB slots (Light & Camera)
Design Solution:
Use a USB 2.0 Splitter & USB 2.0 Extension cable.
Problem 5: Permanent smudges and glue residue on reflective acrylic surface
Design Solution:
Clean surface with WB40 to minimize the affected area.
Wednesday 14 January 2015
Stages Of Decryption In Display Project
My public display is a basically a puzzle and the puzzle is made of 5 levels of encryption. Each of these"levels" has a unique background which becomes less and less distorted as the user progresses, the reason I implemented these into my sketch is so that they serve as a visual representation of that the user is progressing. This will hopefully result in the user wanting to finish the puzzle as I believe if there wasn't visual representation of progression a user might get confused or frustrated with the display
Here are the videos for each of the levels in my sketch.
Layer 1 (Start):
This is the first background the user will see and it's the most distorted out of all the backgrounds as it utilizes various distortion techniques such warping and blurring .
Layer 2:
This background will appear once the user unlocks the first padlock, it's still heavily distorted however some of the motion effects used in the first background have been removed therefore it's visually clear that the user is progressing as there's evidence that the encryption is degrading.
Layer 3:
Layer 3 of the sketch removes an overlaying cloud effect which was utilized in the previous background which greatly increases the visual clarity of the sketch for the user. This layer serves as the mid point in the sketch so the user can visually see that they have greatly progressed since the start however it's evident that there's still work to do.
Layer 4:
Layer 4 removes all of distortion effects which hid the background previously however the image of a "safe" represents a "barrier" therefore the user would understand that there's at least one more layer to this puzzle before it's completely encrypted
Layer 5 (Final):
This is the final stage of the puzzle and congratulates the user on completing the puzzle. All of the padlocks must be unlocked to enable this background to show.
Tuesday 13 January 2015
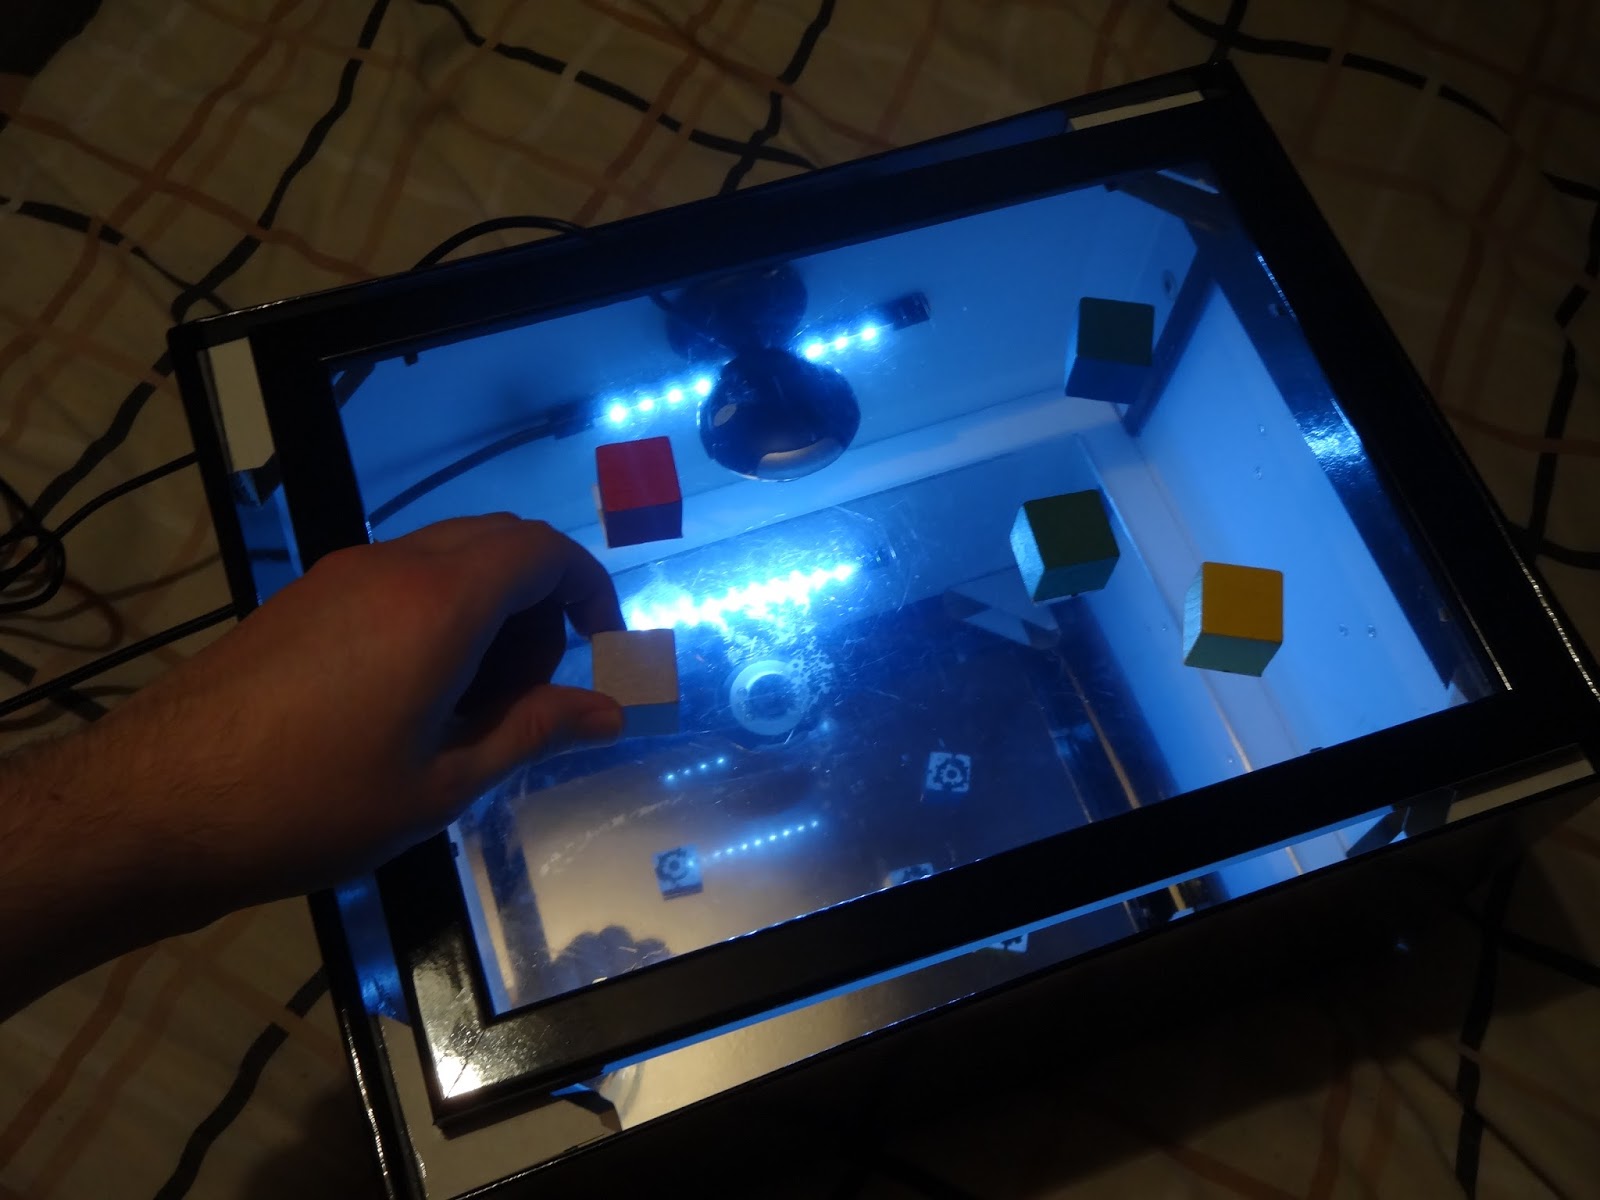
ShoeBox Contraption Completion & Testing
The objects weren't detected by the webcam as quickly I would of hoped and there certain spaces where the glare off the glass base is too intense that the webcam cant see the trackable tag.

During a long period of testing I was able to complete four of the five encryptions on my sketch however due to the glare issue I was unable to generate the required distance to complete the final encryption.

Tuesday 6 January 2015
Mid- Project review
I believe my public display project has progressed massively in the last week and half. I think my sketch will be interesting and challenging for most of the people who interact with it as I think I've programmed it so that the sketch becomes more difficult as you progress. One worry I do have with my project is it's reliability, the project is very dependant on the webcam constantly tracking the objects.
As I'm currently in the process of building the "shoebox" contraption which will serve as the base for the trackable objects when I test it in the space, I'm unable to predict how well this shoebox design will function. However through testing using the "Trackmate Simulator" if the trackable objects fail to function correctly this would likely frustrate the user and would need to be improved in further iterations.
The way my project has developed since the start is that my project has become more and more dynamic throughout iterations. At the start the primary focus was the functionality of the project so as the project began to function as specified in the pseudo code it enabled me to focus on the graphical presentation of the project.
I believe the programming for my project is almost done therefore enabling me to work on the "Shoebox" contraption for the remainder of the time until the deadline.
Saturday 3 January 2015
Dynamic Background
I have updated the background for my sketch from a static image background and changed it into a dynamic video background. The video was made in Adobe After Effects enabling me to apply effects which distort the background image in a dynamic way. This dynamic distortion fits the criteria of the concept i've chosen and i'm planning to utilize this video method various times in the sketch. One disadvantage of utilizing videos is the file size for the sketch will dramatically increase however it may be possible to compress these videos to reduce file size.
I plan to initially begin the sketch with a heavily distorted background however with every padlock unlocked the background image gets less and less distorted. This would overall make my display more visually attractive as-well as serve as another visual indicator to show the user that they are progressing in the puzzle.
Thursday 1 January 2015
Processing Project: Padlock System Alteration
In a previous post I stated how my sketch was coded so that the background images changes as the user decrypts the puzzle. Due to me wanting to implement a dynamic background I decided to change the padlocks into individual PNG images instead of a JPG consisting of a row of padlocks. Changing the padlocks into PNGs enables them to become transparent therefore enabling separate images to fill the majority of the screen. The sketch has pretty much the same functionality as it did before however I haven't decided what my final background image should be.

Implementing PNG images into my sketch enables the PNG images to distort the background image. The PNG images can serve as a facade for the encrypted data therefore utilizing a steganography form of encryption.
Subscribe to:
Posts (Atom)